
What are Dynamic Links?


Dynamic-link is a service provided by firebase that takes care of all of that for you. You can create your links in the console or programmatically and share them with other users. They allow you to define the action to take per platform and tailor the experience exactly how you want it to be. Per platform, it also automatically tracks how many people clicked the link, the platform they were on, and if they completed the intended action. In short, dynamic-link is a smart link. It is handled differently on each platform but you can choose how it’s handled.
Implementation
The project we are using already has the firebase project setup for communication for the Android project. No firebase project setup will be done in this tutorial. Episode one covers that if you still have to setup your project. In this tutorial we will cover the following things.
- Creating a dynamic link in the console
- Handling it in the application
- Checking the deeplink url and perform navigations
- Create a dynamic link programatically
- Debug deeplink and behaviour tips
Lets get started.
Create a dynamic link in the console
Navigate to the Firebase Console, open up your project. In the left navigation bar scroll down to the complete bottom and click on Dynamic links. Click on get started and press next with the default values until you see the following screen.

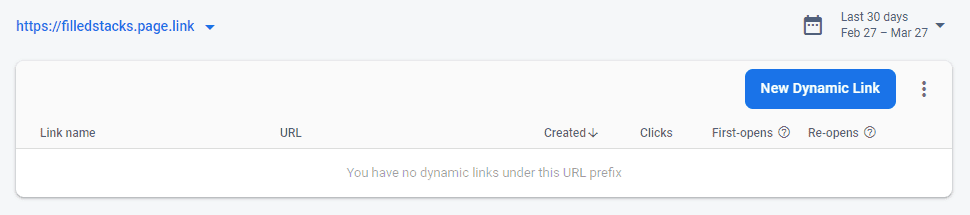
You will be given a default prefix or you can enter your own based on your project name. Click on the “New Dynamic Link” button. You will be presented with 5 steps.
- Supply your short URL: Enter “create-first-post” and check to see your Link preview looks like this https://filledstacks.page.link/create-first-post . With your prefix of course. Go next.
- Supply your dynamic link URL: This has to be a valid URL that the browser can navigate to. It’s also the link that will be retrieved in your app, this is what you’ll use to pass params that you’ll need for deep-linking. I’ll set mine to the following. https://www.compound.com/post?title=This+is+my+first+post .We will extract the title query param in the code to perform our deep link. I’ll set the Dynamic Link Name to “Create First Post”
- iOS Behavior: Select “Open deep link Url in Browser”. This is the link from 2.
- Android Behaviour: Select “Open the deep link in your Android App”. Select your current firebase app. I’ll select com. filled stacks compound. THIS HAS TO MATCH YOUR APP ID. This is how we tell firebase which app to link the deep link info to. 4a. What happens if the app is not installed: Select “Google Play page for your app”. If your app is on the store with a matching Id it will open the store for installation. To avoid having to put an app into the store for testing I will skip the testing of this part in this tutorial. There are more advanced settings that you can cover in your own time if you require them.
- Campaign tracking: We won’t enter any details here. This is where you’d track which links you’re sending and which campaigns they belong to.
Create the link. When it’s completed you should see something like below when you go to hover over the URL link.


That is the link that will be used when sharing the link anywhere. On the right side, there are three dots that you can press for additional options. You can view the details and edit them, we’ll check out the link preview later.
Handle dynamic links in the app
Let's move onto the actual implementation. To implement dynamic links in Flutter we’ll make use of the firebase_dynamic_links package. Open your pubspec.yaml file and add it as a dependency.
firebase_dynamic_links: ^0.7.0+1Under the services, folder create a new file called dynamic_link_service.dart. We’ll create a Future called handleDynamicLinks. This is where we’ll check if there’s an initial link that the app has been opened with and handle it and we’ll register the online function with a success and error callback function. These functions will ONLY be fired if the app is opened from the background or suspended state using the deep link. The register call can be split from the handleDynamicLinks call but for this example, I’m leaving it in one function since it’s not that much code.
class DynamicLinkService {
    Future handleDynamicLinks() async {
    // 1. Get the initial dynamic link if the app is opened with a dynamic link
    final PendingDynamicLinkData data =
        await FirebaseDynamicLinks.instance.getInitialLink();    // 2. handle link that has been retrieved
    _handleDeepLink(data);    // 3. Register a link callback to fire if the app is opened up from the background
    // using a dynamic link.
    FirebaseDynamicLinks.instance.onLink(
        onSuccess: (PendingDynamicLinkData dynamicLink) async {
      // 3a. handle link that has been retrieved
      _handleDeepLink(dynamicLink);
    }, onError: (OnLinkErrorException e) async {
      print('Link Failed: ${e.message}');
    });
  }  void _handleDeepLink(PendingDynamicLinkData data) {
    final Uri deepLink = data?.link;
    if (deepLink != null) {      print('_handleDeepLink | deeplink: $deepLink');
    }
  }
}
Then we’ll register the DynamicLinkService. Go to the locator.dart file and register the service as a singleton instance.
locator.registerLazySingleton(() => DynamicLinkService());And the last step for the setup is to go to the StartupViewModel and call the handleDynamicLinks function.
class StartUpViewModel extends BaseModel {
  ...
  // get the dynamic link service
  final DynamicLinkService _dynamicLinkService = locator<DynamicLinkService>();  Future handleStartUpLogic() async {
    // call handle dynamic links
    await _dynamicLinkService.handleDynamicLinks();
    await _pushNotificationService.initialise();
    ...
  }
}
At this point, you can run the app. Once the app has installed and opened up you can click on the My Firebase dynamic link on the same device you installed the app. It will open the webview for a second or two, then close it down and open your app. When the app is opened and you’re still connected to the debug logs you’ll see the message below.
_handleDeepLink | deeplink: https://www.compound.com/post?title=This+is+my+first+postThis means everything is working fine and we’re ready to perform a deep link operation.
Checking deep link URL and navigating
Now we can add the functionality to the _handleDeepLink function to perform the actions we want to in the app. We want the app to navigate to the CreatePostView and fill in the title we added into the link. To do that we'll have to get the NavigationService from the locator and then do some basic URL string checks.
class DynamicLinkService {
  final NavigationService _navigationService = locator<NavigationService>();  ...  void _handleDeepLink(PendingDynamicLinkData data) {
    final Uri deepLink = data?.link;
    if (deepLink != null) {
      print('_handleDeepLink | deeplink: $deepLink');      // Check if we want to make a post
      var isPost = deepLink.pathSegments.contains('post');      if (isPost) {
        // get the title of the post
        var title = deepLink.queryParameters['title'];        if (title != null) {
          // if we have a post navigate to the CreatePostViewRoute and pass in the title as the arguments.
          _navigationService.navigateTo(CreatePostViewRoute, arguments: title);
        }
      }
    }
  }
}
That’s all there is for the service. The way you’ll handle more going forward is simply by adding more checks. To close down this implementation you could establish a convention and allow the links to navigate to any of your views in the app without you having the change the code. If you pass a route query parameter you can do something like the below.
void _handleDeepLink(PendingDynamicLinkData data) {
  final Uri deepLink = data?.link;
  if (deepLink != null) {
    print('_handleDeepLink | deeplink: $deepLink');    var navigationRoute = deepLink.queryParameters['route'];    var params = deepLink.queryParameters['params'];
    if (params != null) {
      _navigationService.navigateTo(navigationRoute, arguments: params);
    }
  }
}
Once you and your team establish a convention for the links and what data you’d expect to pass in then you can set it up so you never touch this service again. The last part of this implementation is to make them CreatePostView awareness that we'll be sending it a title to show. Open up the router.dart file and update the CreatePostViewRoute case to the following.
case CreatePostViewRoute:
    String postTitle;
    Post postToEdit;    // if it's a string we set postTitle
    if (settings.arguments is String) {
      postTitle = settings.arguments;
    }
    // if it's a post we set post to edit
    else if (settings.arguments is Post) {
      postToEdit = settings.arguments as Post;
    }    return _getPageRoute(
      routeName: settings.name,
      viewToShow: CreatePostView(
        edittingPost: postToEdit,
        postTitle: postTitle,
      ),
    );
We check what type the arguments are and then set those values. We pass both to the CreatePostView through the constructor. Open up the CreatePostView class. We'll update the constructor to take in a new String post title. We'll
class CreatePostView extends StatelessWidget {
  ...
  final Post edittingPost;
  final String postTitle;
  CreatePostView({
    Key key,
    this.edittingPost,
    this.postTitle,
  }) : super(key: key);
  @override
  Widget build(BuildContext context) {
    return ViewModelProvider<CreatePostViewModel>.withConsumer(
      viewModel: CreatePostViewModel(),
      onModelReady: (model) {
        // If we have a post to edit, run edit logic
        if (edittingPost != null) {
          titleController.text = edittingPost?.title ?? '';          model.setEdittingPost(edittingPost);
        }
        // if we have a title then set the title equal to the value passed in
        else if (postTitle != null) {
          titleController.text = postTitle;
        }
      },
    ...);
  }
}
And that’s it. If you run the app now, close the app, and open the dynamic link you’ll navigate straight to the CreatePostView with the link title entered.
Create a dynamic link programmatically
This is also quite a straight forward task. Remember those 5 things you had to do when creating a dynamic link in the console, you do that but in code. In the DynamicLinkService create a new function that returns a future called createFirstPostLink that takes in a String title to share. In this function, we will define all the dynamic link parameters and return the Uri.toString() as the result to the caller
Future<String> createFirstPostLink(String title) async {
    final DynamicLinkParameters parameters = DynamicLinkParameters(
      uriPrefix: 'https://filledstacks.page.link',
      link: Uri.parse('https://www.compound.com/post?title=$title'),
      androidParameters: AndroidParameters(
        packageName: 'com.filledstacks.compound',
      ),
      // NOT ALL ARE REQUIRED ===== HERE AS AN EXAMPLE =====
      iosParameters: IosParameters(
        bundleId: 'com.example.ios',
        minimumVersion: '1.0.1',
        appStoreId: '123456789',
      ),
      googleAnalyticsParameters: GoogleAnalyticsParameters(
        campaign: 'example-promo',
        medium: 'social',
        source: 'orkut',
      ),
      itunesConnectAnalyticsParameters: ItunesConnectAnalyticsParameters(
        providerToken: '123456',
        campaignToken: 'example-promo',
      ),
      socialMetaTagParameters: SocialMetaTagParameters(
        title: 'Example of a Dynamic Link',
        description: 'This link works whether app is installed or not!',
      ),
    );    final Uri dynamicUrl = await parameters.buildUrl();    return dynamicUrl.toString();
}
That’s about it. When you want to add a feature where you can share it with a friend for them to make a first post you can add UI to type a title and then share the link with them with a title that you put in for the post.
How To Set Up Bottom Navigation Bar In Flutter App
ReplyDeleteThe Material Design specification describes a bottom navigation bar as a row of three buttons at the bottom of the screen that are used to select among as many destinations..
For More Info:- How To Set Up Bottom Navigation Bar In Flutter App